Set up replies
Turn your sender address into a real inbox with one DNS record, or send replies to an inbox you already use.
Campaign emails come from an address on your sending domain, such as hello@mail.yourdomain.com. That address has no mailbox of its own. If you have no Google Workspace or Outlook inbox to use as a Reply-to, replies have nowhere to land. You can make the sender address a real inbox and read replies on the Inbox page instead.
You choose where replies go while you set your sender identity. The choice is optional: campaigns send either way, and you can change it any time in Settings, Email, Replies.
-
Pick Read them in LinkiFunnels
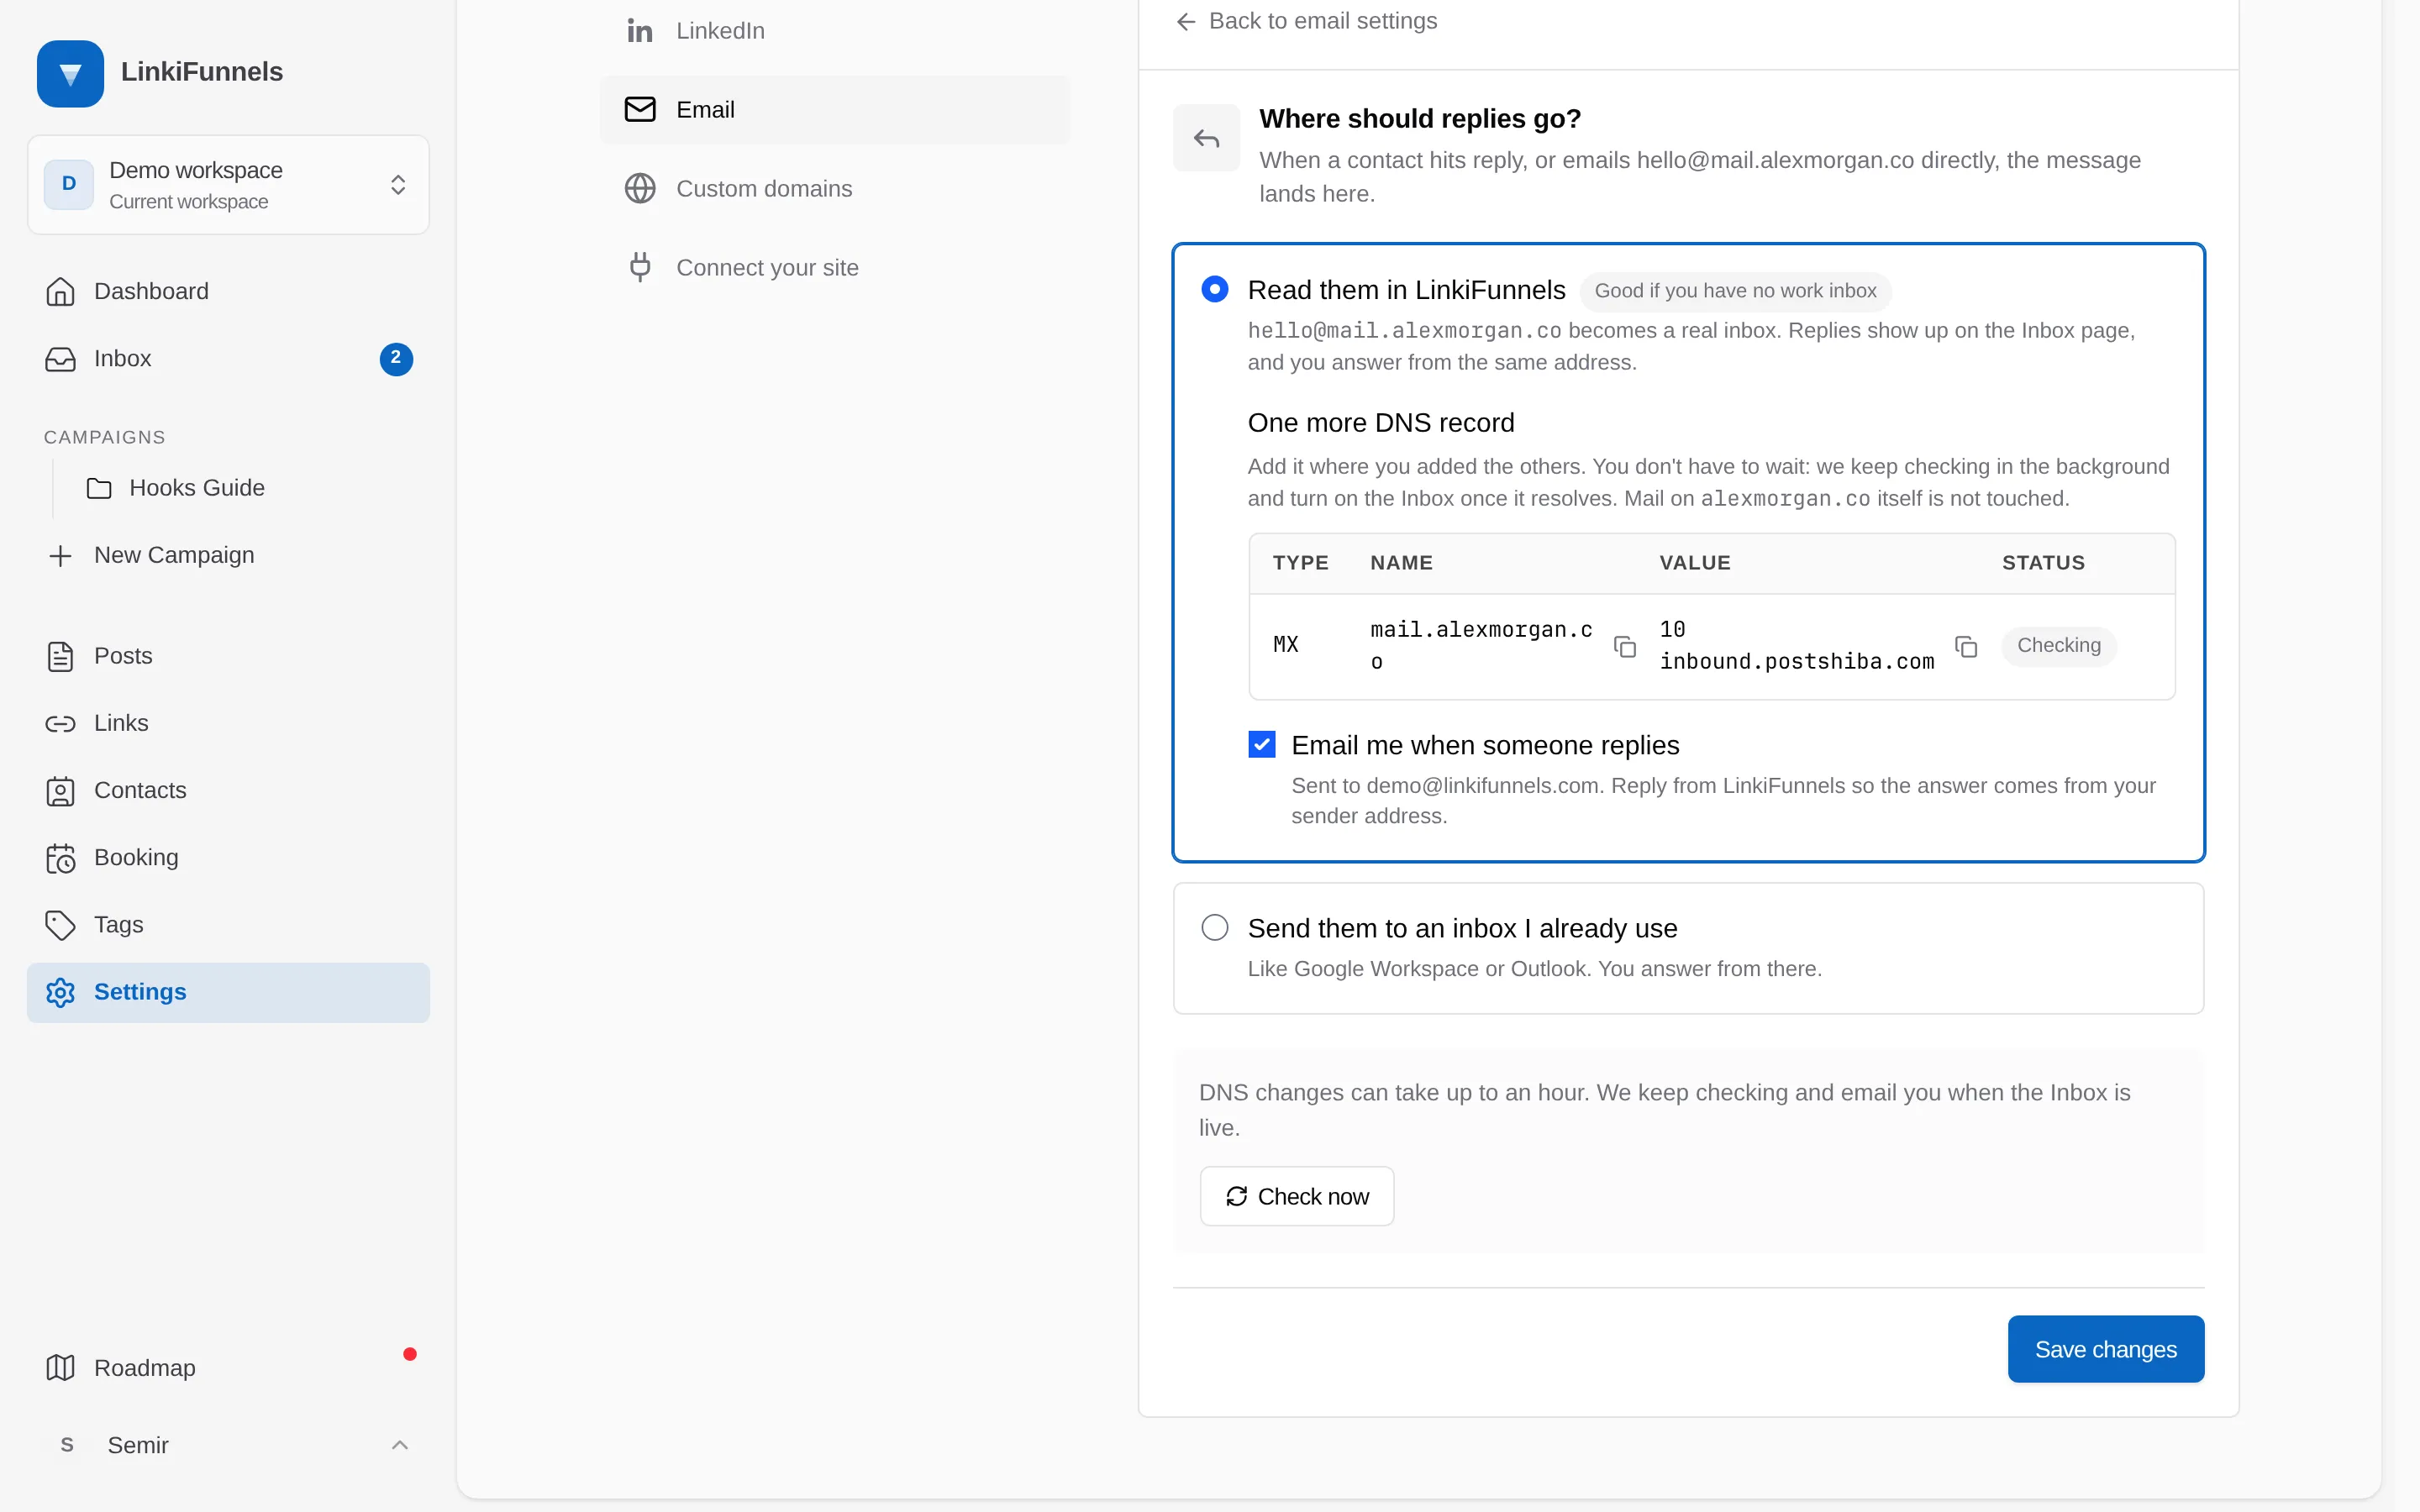
In the Sender and replies step of email setup, or later under Settings, Email, Replies, choose Read them in LinkiFunnels (1). The sender address you typed above becomes the address people reply to.
-
Add the MX record
LinkiFunnels shows one MX record (2): the name is your sending subdomain, for example
mail.yourdomain.com(many DNS providers want justmail), the value isinbound.postshiba.com, and the priority is10. Add it where you added the sending records. It only covers the sending subdomain, so mail to your main domain keeps going wherever it goes today.You don’t have to wait for DNS. Save and continue: LinkiFunnels checks the record in the background and turns the Inbox on as soon as it resolves, usually within an hour.
-
Choose whether to get an email for each reply
Email me when someone replies (3) sends a short heads-up with the message to your account email, so you see replies on your phone. Answer from LinkiFunnels so the reply comes from your sender address. Each teammate sets this for themselves.
-
Check that the Inbox is live
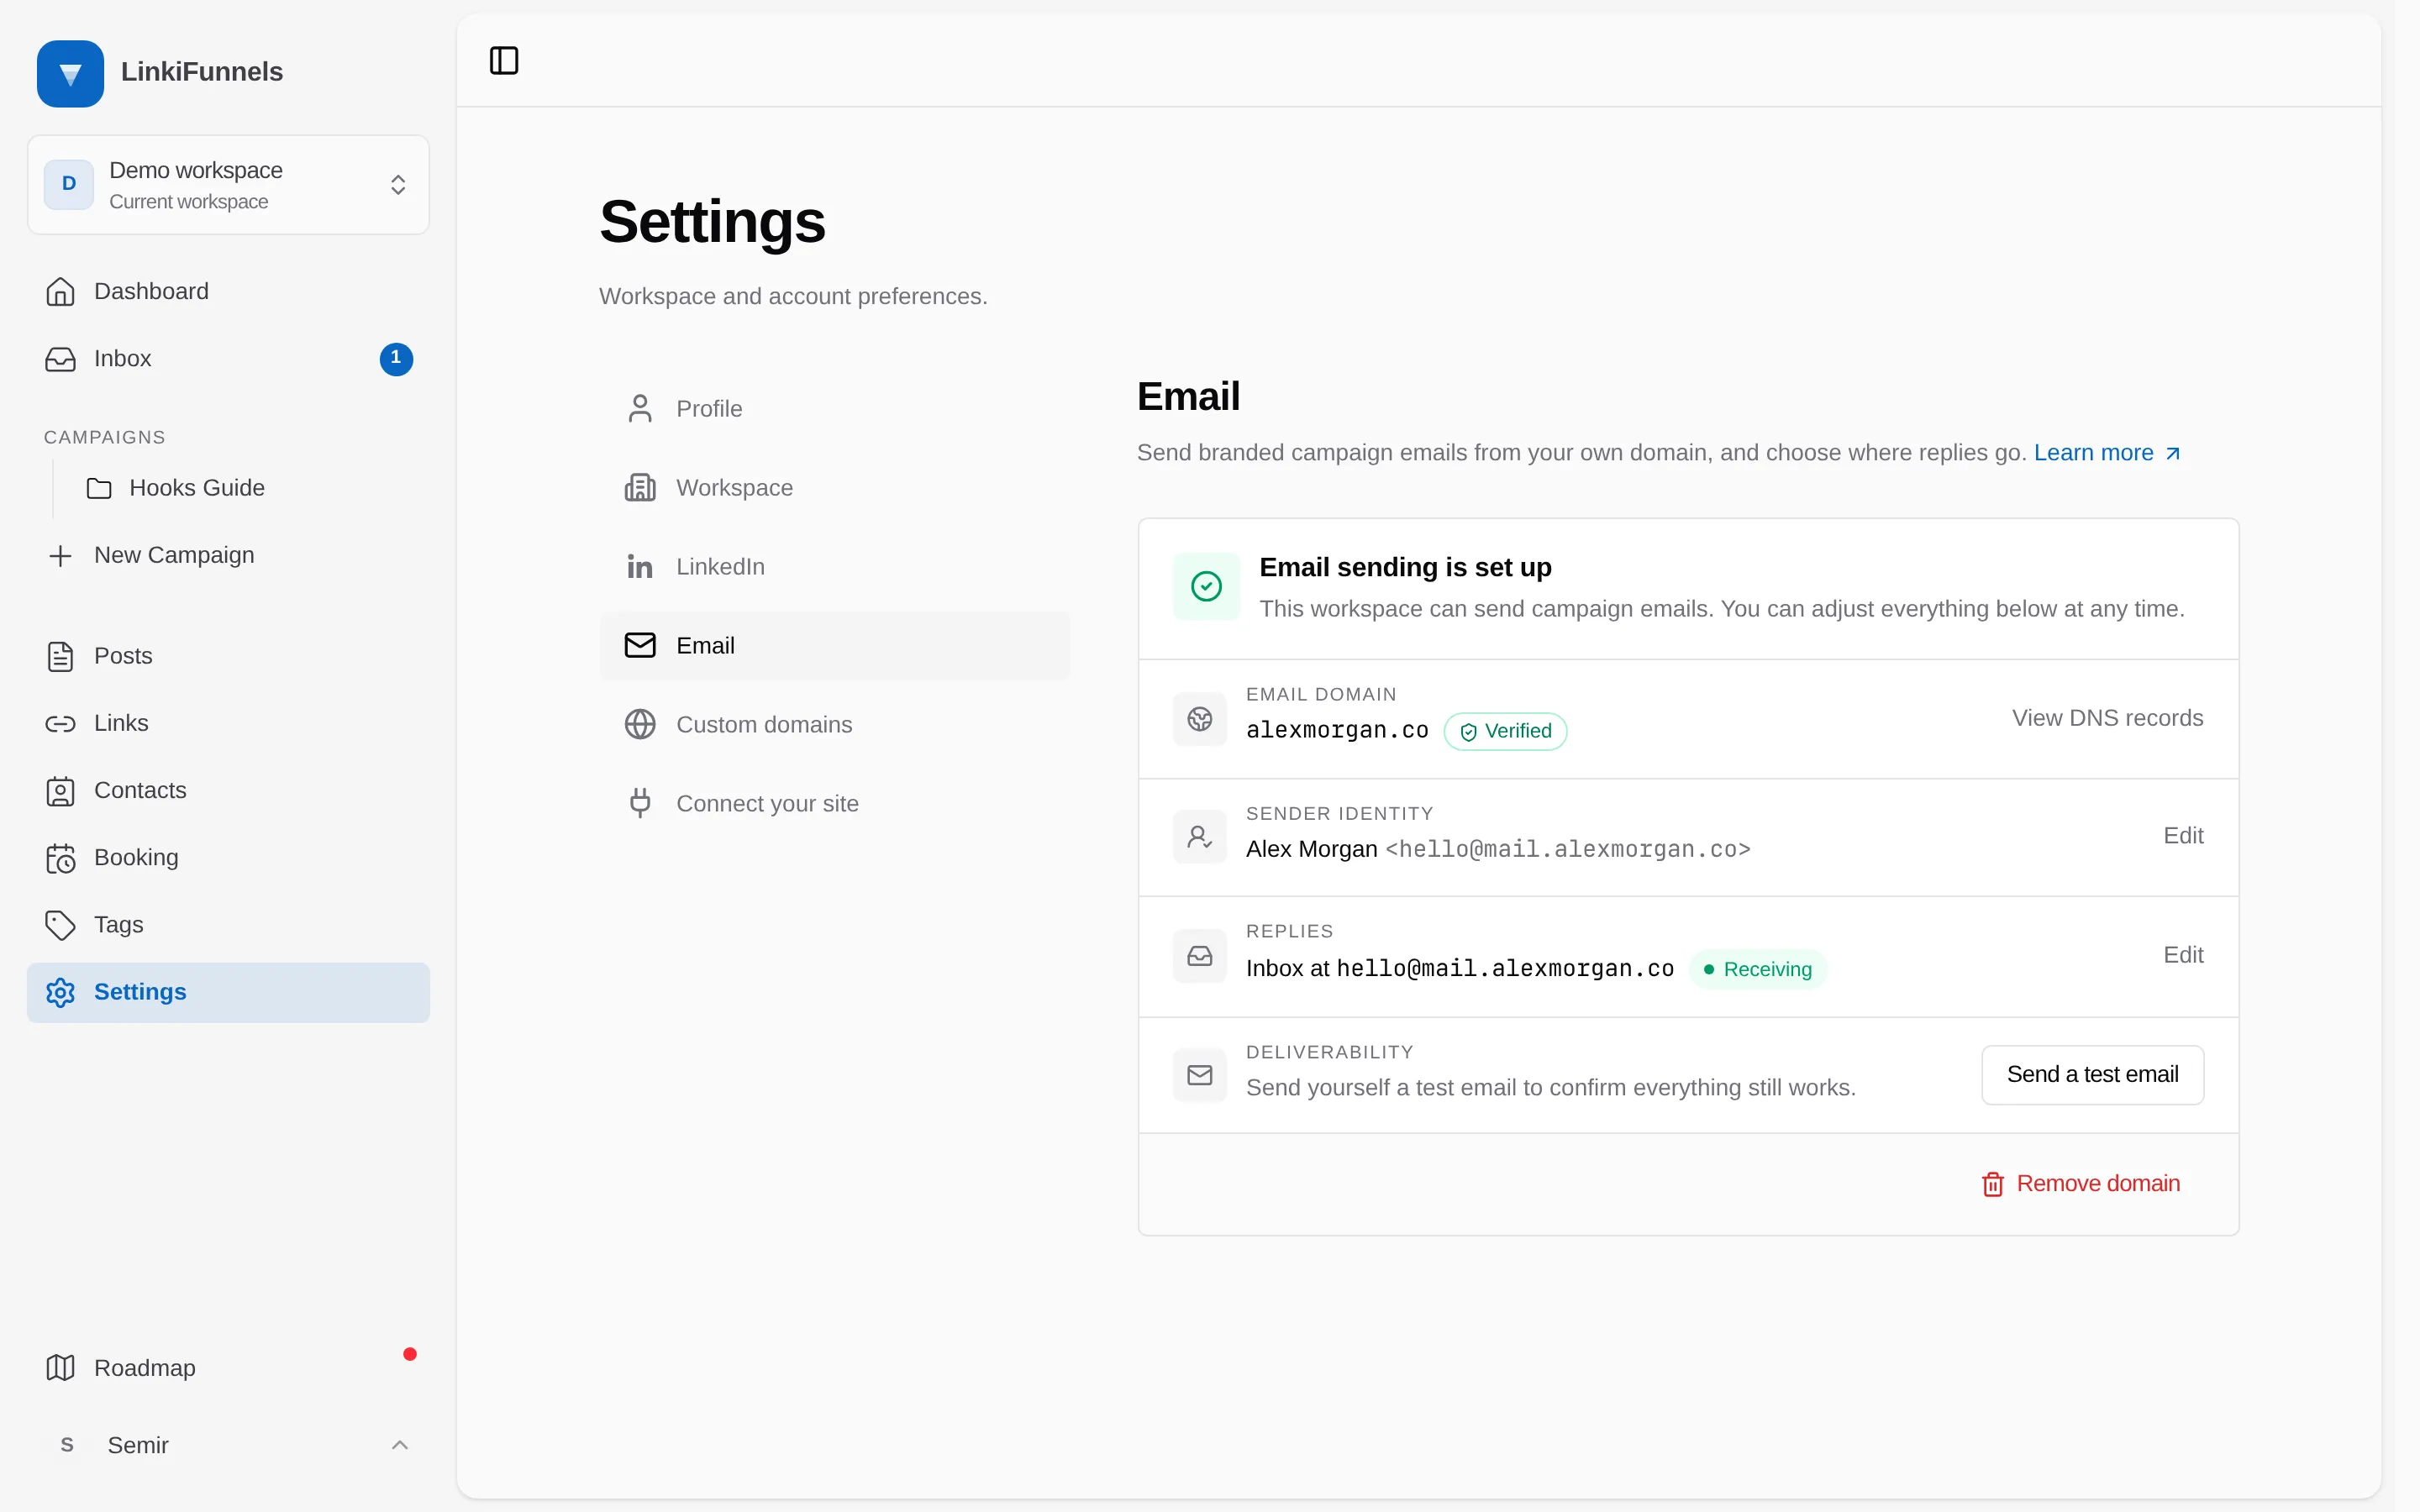
Once the record resolves, Settings, Email shows Replies as Receiving (4), and the Inbox footer reads Receiving at your sender address.